Import proxies
Creating a proxy group
Go to the Proxies section of OpenBullet 2. You will see a group of settings to manage proxy groups. Proxy groups are a way to separate proxies into different groups, so that jobs can use one or more groups, and different jobs are allowed to use any groups of proxies at the same time without conflicts.
![]()
You will need to create a proxy group and give it a name. Once you have created a proxy group, you can import some proxies, which will be added to the selected group.
Different ways to import proxies
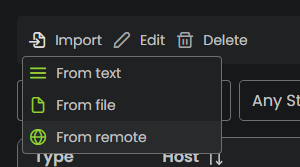
There are three ways to import proxies in OpenBullet 2. You can add them:
- 📋 From text by pasting the proxies into a text box
- 📁 From file on your machine's drive
- 🌎 From remote by providing a remote URL
When using any of these sources, there should be only one proxy per line.
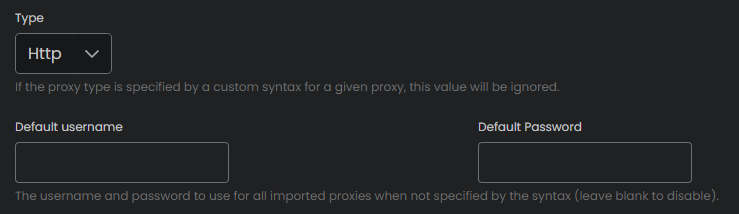
When adding proxies, you need to either use the legacy advanced syntax that OpenBullet 2 recognizes, use standard URI-style proxy strings, or specify the default values that will be used if not specified.
Proxy syntax
The legacy advanced proxy syntax is:
(type)host:port:username:password
For example, if you have a SOCKS 5 proxy listening at 127.0.0.1 on port 8080, which requires the username myuser and password mypass, you can type:
(socks5)127.0.0.1:8080:myuser:mypass
Note that a proxy does not need to have all these values. For example, you can just write the host and port and specify the protocol type through the default type selector, and it will assume that the proxy does not need authentication and that all proxies use the given protocol. This means you can also write proxies like this:
127.0.0.1:8080
You can also use standard URI-style proxy strings, for example:
http://127.0.0.1:8080
https://myuser:[email protected]:8080
socks4://127.0.0.1:9050
socks4a://127.0.0.1:9050
socks5://myuser:[email protected]:9050
In URI-style syntax, the scheme defines the proxy type directly. https://... is accepted and treated like an HTTP proxy.
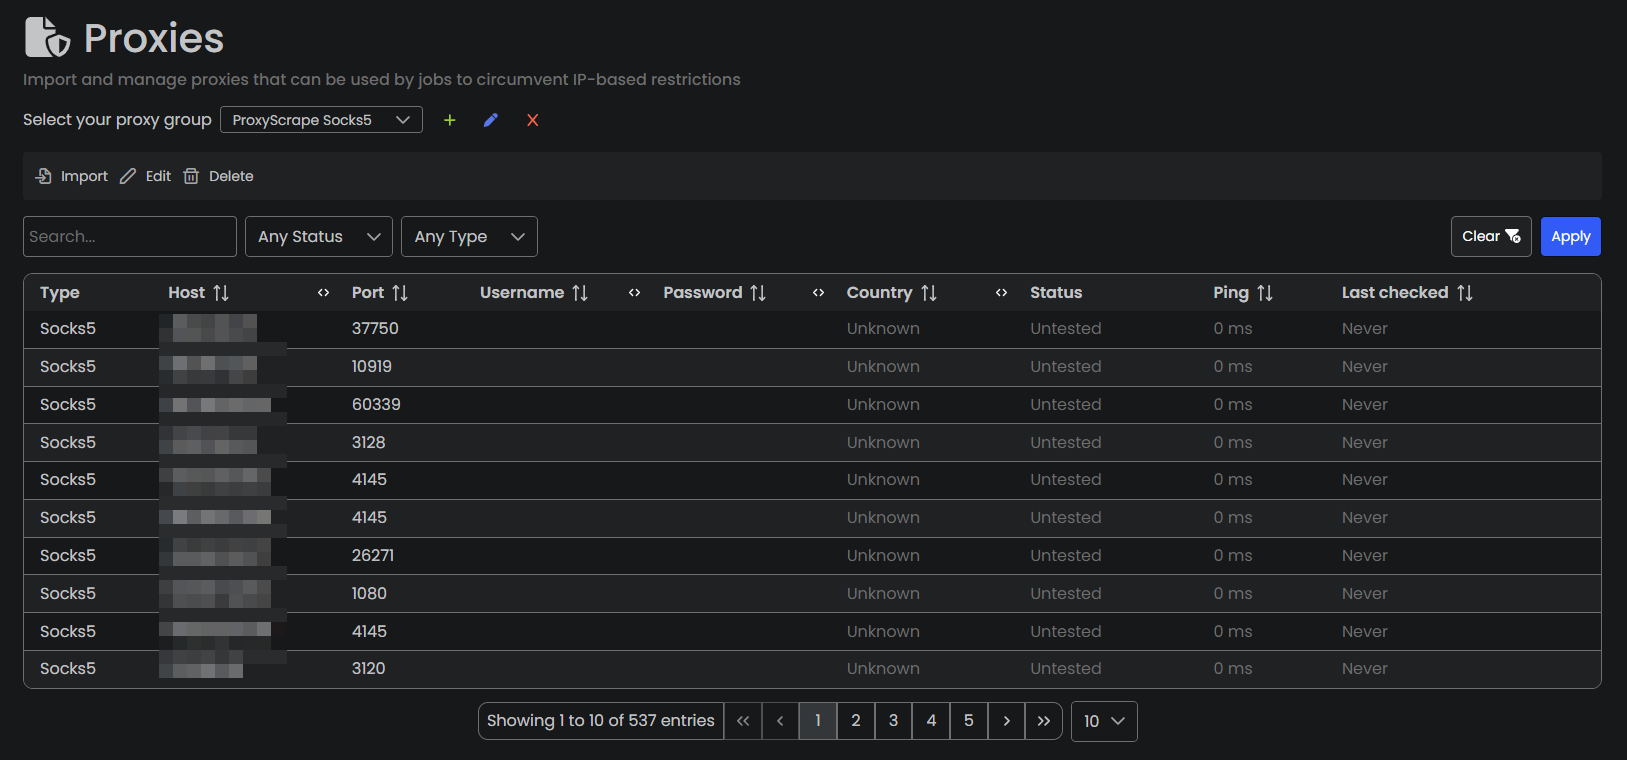
Final result
This is the result after importing the SOCKS 5 freebies from proxyscrape.com: